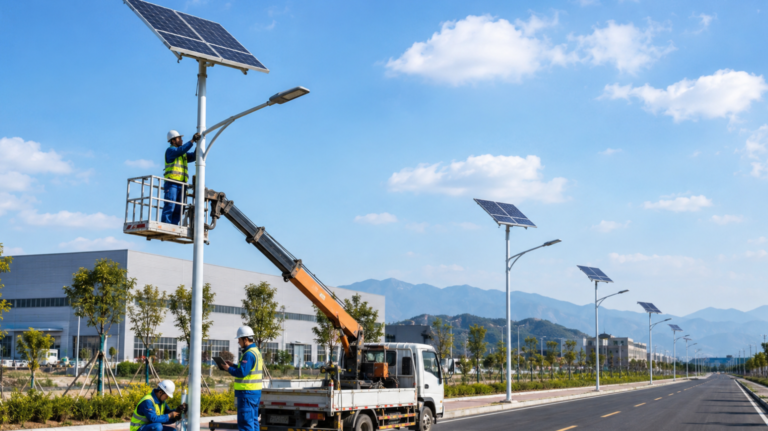
| Step | What to Do | Why It Matters |
| 1. Assess the Installation Site | Check solar exposure, shading, lighting requirements, soil conditions, wind, rainfall, and installation access. | Site conditions determine solar charging, structural safety, and long-term system performance. |
| 2. Confirm the System Components | Match the solar panel, battery, LED light, controller, pole, and foundation to the project requirements. | Correct component matching prevents insufficient charging, short battery runtime, and compatibility problems. |
| 3. Build the Foundation and Install the Pole | Excavate the foundation, position the anchor bolts and cage, pour and cure the concrete, then install and align the pole. | A properly designed foundation keeps the pole stable under local soil and wind conditions. |
| 4. Install the Solar Panel Battery and Wiring | Position the panel correctly, install the battery, connect the controller and LED light, and protect all cables and connectors. | Correct installation ensures reliable charging, safe electrical operation, and protection from weather damage. |
| 5. Test and Commission the System | Check charging performance, battery voltage, controller settings, automatic switching, nighttime operation, and lighting coverage. | Commissioning confirms that the complete solar street lighting system performs as designed before handover. |
Installing a solar street lighting system correctly involves much more than mounting a pole and connecting a lamp. I have found that most long-term problems begin with decisions made before installation, such as poor site assessment, incorrect battery sizing, unsuitable panel orientation, weak foundation design, or mismatched components. A system may work on the first night and still underperform later when cloudy weather, long operating hours, or harsh site conditions expose these weaknesses.
To install a solar street lighting system correctly, I first assess the site and lighting requirements, then match the solar panel, battery, controller, LED light, pole, and foundation. After building the foundation and installing the pole, I complete the solar panel, battery, and electrical connections before testing charging, nighttime operation, lighting coverage, and system safety.
In this guide, I will explain the installation process step by step, from site assessment and component selection to foundation work, wiring, testing, and commissioning. I will also highlight the mistakes that most often affect project reliability, so the final system is not only installed correctly but designed to perform consistently over time.
Why Solar Street Lighting Installation Requires More Than Just Mounting the Light
When I look at a solar street lighting project, I never treat installation as simply putting up a pole, fixing the lamp, and connecting a few cables. Those are only the visible parts of the work. What determines whether the system will still perform reliably months or years later is everything that happens before and around those installation steps. I need to consider the available solar resource, required lighting hours, battery autonomy, LED power, pole height, wind conditions, soil conditions, foundation design, electrical protection, and future maintenance access as one connected system. A street light can look perfectly installed on the day of project handover and still perform poorly later if the battery was undersized, the solar panel is frequently shaded, the foundation was not designed for local ground conditions, or the controller settings do not match the actual operating requirement. This is why I see professional solar street lighting installation as a system-engineering task rather than a simple mechanical installation job.
The Common Misunderstanding About Solar Street Light Installation
One misunderstanding I often see is that installers concentrate too heavily on the physical construction stage because that is the most obvious part of the project. If the pole is vertical, the lamp is secure, the cables are connected, and the light turns on during testing, the installation may appear complete. I do not consider that enough. A solar street lighting system must generate enough energy during the available sunlight hours, store enough electricity to support the specified nighttime operation, and continue working when weather conditions are less favorable than the ideal design day. This means I need to think about daily energy consumption and solar generation together rather than evaluating the lamp, panel, battery, and controller separately. I also need to consider whether the pole and foundation can tolerate the local environment and whether technicians can safely inspect or replace components later. In my experience, many failures that are blamed on “poor solar street lights” are actually the result of weak early-stage planning, because even good equipment cannot compensate for incorrect sizing, unsuitable positioning, or inadequate civil work.
A Solar Street Lighting Project in West Africa
A typical industry situation helps explain why this matters. In one West African rural road scenario, a local electrical contractor had the practical ability to erect poles and complete electrical work, so the initial priority was understandably to obtain competitively priced solar street lights and finish installation within the project schedule. The lights worked after installation, but several months later the operating conditions exposed problems that were not obvious during commissioning. Some units could not maintain the expected lighting duration after consecutive cloudy days, battery backup was lower than the project owner expected, and several poles showed stability concerns because the foundation assumptions did not fully reflect the actual soil conditions. When I look at a situation like this, I would not immediately conclude that the LED lamp itself is the problem. I would first review the system sizing, expected autonomy, local solar conditions, pole and foundation design, and the assumptions used before installation. In this type of project, the real lesson is that the visible failure often begins with an invisible planning decision made weeks or months earlier.
What Usually Causes the Problem
When I review an underperforming solar street lighting project, I normally look for the mismatch between the design assumptions and the real site conditions. A system may have been selected according to nominal lamp wattage without properly calculating total daily energy consumption, or the battery may have been sized for normal sunny days without considering the required backup during poor weather. In other cases, the installer may have selected a convenient pole location without noticing that nearby trees or buildings will create partial shading during important charging hours. Structural problems can also begin when one standard foundation drawing is reused across projects with different pole heights, wind exposure, or soil conditions. These problems are important because they show that solar street lighting performance is not determined by one component. I see the system as a chain, and its long-term reliability is limited by the weakest design or installation decision within that chain.
The Industry Lesson I Take From These Projects
The main lesson I take from projects like this is that reliable solar street lighting depends on three things working together: correct system design, suitable equipment, and professional installation. I would never evaluate those three areas independently because each one affects the others. A larger battery cannot solve a permanently shaded panel location, a premium LED fixture cannot compensate for an undersized energy system, and a well-designed electrical system cannot protect a pole installed on an inadequate foundation. For EPC contractors and electrical companies, this is especially important because the project owner usually evaluates the final system as one complete result. If the lights fail early, the customer rarely separates the responsibility between the battery supplier, lamp supplier, structural contractor, and installer. The EPC company normally carries the reputational risk, which is why I believe more attention should be placed on system integration before installation begins.
Why I Believe EPC Contractors Need More Than an Equipment Supplier
When I work from the perspective of an EPC contractor, I would not choose a solar street lighting supplier based only on lamp price or individual component specifications. I would want a partner who can understand the project location, required operating hours, lighting objectives, environmental conditions, system configuration, and delivery schedule before recommending equipment. The value of a capable supplier is not simply that it can ship solar panels, batteries, controllers, poles, and lamps together; the real value is whether those components have been selected as one coordinated system and whether the supplier can support the EPC team with configuration guidance, technical information, and installation support when questions appear on site. This is particularly important for contractors moving from conventional electrical work into solar lighting, because their installation capability may already be strong while solar generation and storage sizing are still relatively new areas for the team. From my perspective, that is where a reliable system partner provides much more value than a company that only sells individual products.
Why Correct Installation Begins Before the Equipment Reaches the Site
For me, the most important point is that solar street lighting installation actually begins before the crane, concrete, pole, or lamp arrives at the project location. It begins when the project team defines the lighting requirement, assesses the site, understands the available solar resource, confirms the operating schedule, calculates the required energy storage, evaluates structural conditions, and selects a configuration that can realistically perform under those conditions. Once those decisions are correct, physical installation becomes much more predictable. When those decisions are weak, installers are often forced to solve design problems on site, where changes are more expensive and project delays are harder to control. That is why I consider proper planning the first real installation step, and it is also why the next stage of any professional solar street lighting project should begin with a detailed site assessment rather than with equipment mounting.
Step 1 Conduct a Site Assessment Before Installing Solar Street Lights
Before I recommend any solar street lighting configuration, I start with the site rather than the product. This is the first professional step because the same lamp, battery, panel, and pole can perform very differently depending on where they are installed. Solar street lights operate as independent energy systems, so I need to understand how much solar energy is realistically available, what lighting performance the road or facility actually requires, and whether the physical environment can support the planned installation. A good site assessment helps me avoid one of the most common project mistakes: selecting equipment first and trying to make the site fit the system afterward. I prefer to reverse that logic. I first understand the location, operating conditions, and lighting objective, then use that information to determine the system configuration.
Evaluate Solar Radiation and Daily Sunlight Availability
The first thing I evaluate is whether the installation location can provide enough usable sunlight to recharge the battery consistently. I do not only look at whether the site appears sunny during an afternoon visit, because that tells me very little about year-round system performance. I want to understand the local solar resource, seasonal variation, expected daily sunshine availability, and whether the project experiences long rainy or cloudy periods. This information directly affects solar panel sizing and battery autonomy. If a street light consumes more energy every night than the panel can realistically recover during the following day, the battery will gradually remain at a lower state of charge, even if the system appears to work normally during commissioning. In my experience, this is why some solar street lights operate well in the first few weeks but begin showing shorter lighting hours when unfavorable weather arrives. I therefore treat solar radiation data as a design input rather than a general climate reference.
Check Shadows and Select the Correct Solar Panel Location
I also pay close attention to shading because even a technically correct solar street lighting system can underperform when the panel is installed in the wrong position. Trees, nearby buildings, utility poles, signs, walls, and future vegetation growth can reduce the useful charging period during the day. I try to evaluate the sun path rather than simply checking whether the panel receives sunlight at one moment. A location that looks clear at midday may be shaded for several important morning or afternoon hours, and that lost generation can become significant over time. I also consider the final pole position, panel orientation, and whether the proposed angle can be installed without obstruction. My objective is to give the panel the longest practical period of direct solar exposure while keeping the installation structurally safe and accessible for maintenance. Poor solar exposure does not only reduce energy generation; it directly affects battery charging, available nighttime operating hours, and ultimately the customer’s perception of the entire project.
Analyze the Actual Lighting Requirement
Once I understand the solar conditions, I evaluate what the project is actually expected to illuminate. I do not believe a solar street light should be selected simply by asking the customer what lamp wattage they want, because the required lighting performance depends on the application. A rural road, factory entrance, industrial park, community street, parking area, and security perimeter can all require very different combinations of pole height, lighting distribution, spacing, brightness, and operating schedule. I therefore look at the road width, traffic or pedestrian activity, critical areas that need stronger visibility, required lighting distance, expected operating hours, and whether the project has specific security requirements. For example, a lightly used rural road may prioritize reliable all-night operation and wide coverage, while a factory entrance may need stronger illumination around vehicle access points and security checkpoints. In an industrial park, uniformity and continuous coverage may be more important than simply achieving high brightness directly beneath each pole. Understanding this difference helps me design for the real project objective rather than oversizing or undersizing the system based on a single lamp specification.
Match Operating Hours With Energy Storage Requirements
Lighting duration is another point I confirm during the site assessment because it directly influences the required battery capacity. Some projects need continuous lighting from sunset to sunrise, while others can use programmed dimming or motion-based control during low-traffic hours. I always want to know whether the customer expects full brightness throughout the night, reduced output after midnight, or different operating modes during different periods. These decisions affect daily energy consumption and therefore influence both the solar panel and battery design. If this information is ignored, an installer may select a system that performs well on a normal night but cannot maintain the required lighting duration during cloudy conditions. From my perspective, the correct question is not only “How bright should the light be?” but also “How much energy must the system deliver every night, and how many difficult weather days should it continue operating without normal charging?”
Check Soil Conditions and Foundation Requirements
The electrical design is only half of the site assessment; I also need to understand whether the ground can safely support the pole and foundation. Soil conditions vary significantly between project locations, and I do not assume that one standard foundation design will automatically work everywhere. Loose soil, sandy ground, soft clay, filled land, rocky terrain, or areas with poor drainage can require different construction considerations. Pole height, luminaire size, solar panel surface area, and local wind conditions also influence the structural load transferred to the foundation. This becomes especially important with solar street lights because the solar panel creates additional wind exposure above the pole. If foundation conditions are underestimated, the problem may not be visible immediately after installation, but pole movement, tilting, or structural instability can develop later. I therefore regard foundation planning as part of system reliability, not simply civil work completed after the equipment has already been selected.
Evaluate Wind Temperature and Rainfall Conditions
Environmental conditions also influence how I evaluate the suitability of a solar street lighting configuration. High wind exposure affects pole strength, brackets, fasteners, and foundation requirements, particularly along open roads, coastal areas, and exposed industrial sites. High ambient temperature can influence battery performance and component aging, while heavy rainfall and high humidity increase the importance of waterproofing, drainage, cable protection, and enclosure design. In tropical markets, I also consider the combination of heat and moisture rather than looking at each factor separately, because equipment may operate under high temperature during the day and remain exposed to moisture throughout the night. I do not see these environmental conditions as secondary details. They are part of the actual operating environment the system will experience for years, so they should influence equipment selection and installation planning from the beginning.
Confirm Installation Access Before Finalizing the Design
Finally, I check whether the project can actually be installed and maintained using the equipment and resources available locally. A design may look technically correct on paper but become unnecessarily difficult if trucks, excavators, cranes, concrete equipment, or maintenance vehicles cannot easily reach the installation area. Narrow rural roads, muddy ground, steep terrain, active factory sites, and remote community locations can all change the installation method and project schedule. I also think about future access because batteries, controllers, lighting fixtures, and other components may eventually require inspection or replacement. When I complete a site assessment, my objective is therefore not only to decide where each solar street light should stand. I want to understand how the system will be transported, installed, operated, inspected, and maintained throughout its service life. That information gives me a much stronger foundation for the next stage of the project: selecting and sizing the solar panel, battery, controller, lighting fixture, pole, and other system components.
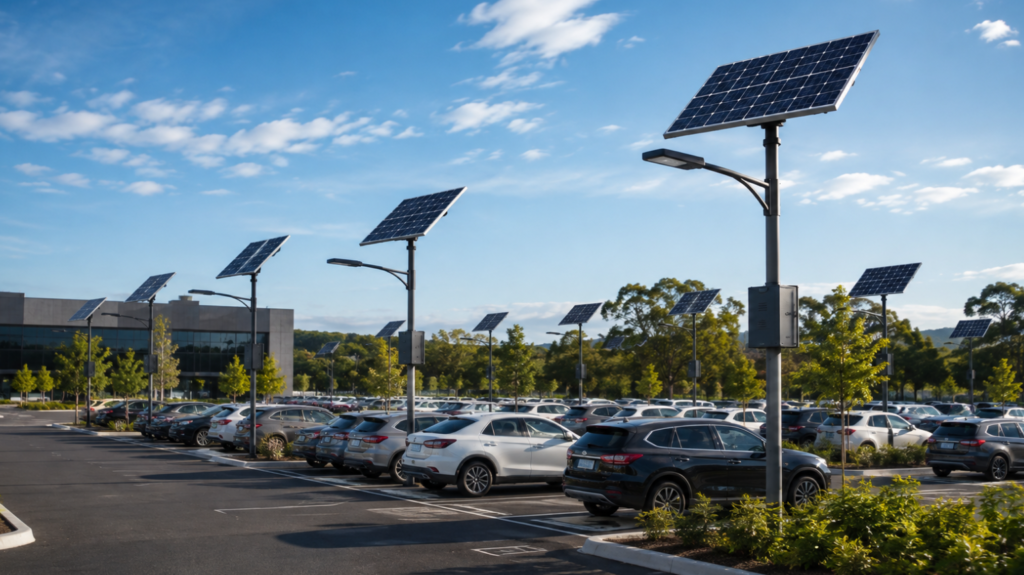
Step 2 Understand Solar Street Lighting System Components Before Installation
Before I move from site assessment into installation planning, I make sure the project team understands how the main solar street lighting components work together. I do not see the solar panel, battery, LED fixture, controller, pole, and foundation as separate products, because the reliability of the entire system depends on how well these parts are matched. A street light can use high-quality components and still perform poorly if the panel cannot generate enough daily energy, the battery is undersized, the controller is incorrectly configured, or the pole structure is not suitable for the local environment. For me, component selection is therefore not simply a purchasing decision. It is a system-design decision that determines whether the light can achieve the required brightness, operating hours, weather tolerance, and service life after installation.
Solar Panel
I treat the solar panel as the starting point of the energy supply because it is responsible for converting available sunlight into the electricity that will eventually power the light at night. Its rated wattage matters, but I never evaluate panel capacity by wattage alone. I also consider the actual solar resource at the project location, expected charging hours, seasonal weather patterns, panel orientation, and mounting angle. A panel that is incorrectly oriented or installed at an unsuitable angle can produce significantly less usable energy than the design expects, even when its nominal specification looks adequate. I also pay attention to shading, because nearby trees, buildings, utility structures, or even poor pole positioning can reduce charging during critical hours of the day. In practical projects, I want the solar panel to generate enough energy not only for one normal night of operation but also to restore battery capacity after difficult weather periods. This is why I see correct orientation and suitable mounting geometry as part of energy design rather than simply installation details.
Battery Storage System
The battery is the component that determines how long the lighting system can continue operating after the sun goes down, so I usually pay very close attention to battery capacity, usable depth of discharge, expected cycle life, and operating temperature. In a properly designed solar street lighting system, the battery must be large enough to support the required nightly energy consumption and still provide reasonable autonomy during cloudy or rainy periods. If the battery is too small, the system may appear normal during sunny weather but begin reducing brightness or shutting down when solar charging becomes insufficient. I generally prefer lithium battery technology for many modern projects because it offers relatively high energy density, better cycle performance, lower maintenance requirements, and more flexible installation compared with older battery technologies, but I still do not assume that “lithium” automatically means the battery is suitable. I need to consider cell quality, battery management, charging limits, discharge protection, enclosure design, and temperature conditions together. High ambient temperature can accelerate battery aging, while poor protection against overcharge, over-discharge, short circuit, or abnormal temperature can shorten service life and create reliability problems. For me, the battery must be selected as part of the complete load and energy balance, not as an isolated capacity number.
LED Lighting Unit
The LED lighting unit determines how effectively the stored energy is converted into useful illumination, so I evaluate more than the stated lamp wattage. I look at actual lighting output, electrical efficiency, optical distribution, mounting height, and the area that needs to be illuminated. A high-wattage lamp is not always a better solution if its beam pattern does not suit the road or application. For example, a rural road may require wider and more uniform coverage, while a factory entrance or security checkpoint may require stronger illumination in specific zones. I also consider how efficiently the fixture converts electrical power into useful light because every watt consumed at night must first be generated by the solar panel and stored in the battery during the day. If the lighting unit is inefficient, the entire system needs a larger panel and battery to achieve the same operating time. This is why I prefer to think in terms of lighting performance and energy efficiency rather than simply comparing lamp wattage.
Solar Controller and Energy Management
The solar controller is one of the most important components in the system because it manages the relationship between the solar panel, battery, and lighting load. I use it to control charging, protect the battery from unsuitable operating conditions, and manage when and how the light operates during the night. In practical projects, controller settings can have a major impact on system reliability because the lighting schedule, dimming strategy, and battery protection thresholds directly influence daily energy consumption and long-term battery health. If the project requires full brightness in the early evening but lower output during low-traffic hours, the controller can reduce unnecessary energy consumption and extend the available operating time. I also pay attention to whether the control logic is appropriate for the battery chemistry and system voltage, because incorrect charging or discharge settings can reduce battery life even when the hardware itself is good. From my perspective, the controller is not simply an electronic switch; it is the energy-management layer that helps balance lighting performance with the amount of solar energy available.
Mounting Pole and Foundation
I consider the pole and foundation part of the energy system because structural failure can make an otherwise well-designed electrical system unusable. The pole must safely support the LED fixture, solar panel, brackets, cables, and any integrated battery or controller while remaining stable under local wind conditions. Solar panels create additional surface area above the pole, which means wind loading can become more significant than in a conventional street light installation. I therefore consider pole height, material strength, bracket design, foundation dimensions, soil conditions, drainage, and local environmental exposure together. A foundation that is adequate for one site may not be suitable for another if the soil is softer, the pole is taller, or the project is located in an exposed coastal or open-road environment. Long-term stability also depends on corrosion protection, fastening quality, and how well the installation handles repeated wind and weather exposure. For me, structural design should never be treated as an afterthought because a reliable solar street lighting system must remain electrically functional and physically safe throughout its intended service life.
Why Component Matching Matters More Than Individual Specifications
When I review solar street lighting proposals, I often find that buyers compare individual specifications one by one, such as panel wattage, battery amp-hours, lamp wattage, or pole height. Those numbers are useful, but I do not consider them enough to judge system quality. What matters more is whether the components have been sized and configured to work together under the actual project conditions. A larger LED light increases nightly consumption, which may require a larger battery and more solar generation. A taller pole changes both lighting distribution and structural requirements. A longer lighting schedule affects battery autonomy, while local cloudy weather changes the amount of energy the system can recover each day. I therefore evaluate the project as an energy and structural balance rather than a list of products. When the panel, battery, LED fixture, controller, pole, and foundation are correctly matched, the installation team can move into construction with much greater confidence, which is why I always make component understanding and system compatibility part of the planning process before installation begins.
Step 3 Prepare the Foundation and Install the Solar Street Light Pole
Once I have confirmed the site conditions and system configuration, I move to the civil and structural stage of the project, because this is where the long-term physical stability of the solar street lighting system begins. I never treat the foundation and pole as simple support structures. They carry the solar panel, LED fixture, brackets, cables, and sometimes integrated battery components, while also resisting wind, rain, vibration, and years of outdoor exposure. A system can be electrically well designed and still fail if the pole leans, the anchor bolts move, or the foundation cracks. For this reason, I consider foundation preparation and pole installation one of the most important stages in a professional solar street lighting project.
Foundation Construction Process
I begin by confirming the exact installation location before any excavation starts, because moving a foundation after construction is difficult and costly. I check that the selected position matches the lighting layout, provides sufficient solar exposure, does not conflict with underground utilities, drainage paths, road edges, or future construction, and allows safe access for installation equipment. Once the location is confirmed, I prepare the foundation excavation according to the pole height, expected wind load, soil condition, and structural requirements. After excavation, I install the foundation cage and anchor bolts carefully, making sure they are positioned correctly before concrete is poured. I then pour the concrete around the reinforcement structure, control the alignment during the process, and allow sufficient curing time before the pole is installed. I do not rush this stage because a foundation that has not reached adequate strength can shift or crack when the pole is lifted into position.
Why Anchor Bolt Alignment Foundation Depth and Soil Conditions Matter
I pay particular attention to anchor bolt alignment because even a small positioning error can create problems when the pole base plate is installed. If the bolts are not vertical, evenly spaced, or correctly positioned relative to the road direction, the installation team may be forced to enlarge holes, apply uneven force to the base plate, or correct the pole position with washers and temporary adjustments. These shortcuts can reduce structural reliability. Foundation depth is equally important, but I do not use one fixed depth for every project. I consider pole height, panel surface area, expected wind conditions, and local soil bearing capacity together. A compact, stable soil may support a different foundation design from loose sand, soft clay, filled ground, or areas affected by heavy rainfall and erosion. In my experience, the safest approach is to treat the foundation as a site-specific structural element rather than a standard accessory that can be copied from one project to another.
Pole Assembly and Installation
After the foundation has cured properly, I prepare the pole assembly before lifting it into position. I prefer to complete as much work as practical at ground level because it allows the installation team to work more safely and accurately. I assemble the pole sections, install the solar panel bracket, prepare the LED lighting fixture, route the required cables, and check the position of any controller or battery compartment before lifting. Once the pole is ready, I use suitable lifting equipment to raise it carefully and guide the base plate onto the anchor bolts. I then secure the base with the correct nuts and washers, tightening them gradually and evenly rather than applying full force to one side first. This helps prevent the base plate from sitting unevenly and reduces unnecessary stress on the foundation.
Check Vertical Alignment Before Final Tightening
Before I complete the final tightening, I always check the vertical alignment of the pole from more than one direction. A pole that appears straight from one viewpoint can still lean slightly in another direction, especially if the foundation surface is uneven or the base plate has not seated correctly. I use proper leveling methods rather than relying only on visual judgment, and I make any necessary adjustment before the anchor nuts are fully secured. I also confirm that the lighting arm and solar panel orientation match the project design, because correcting these positions later becomes more difficult once the pole is fully fixed. This final alignment step may seem small, but it directly affects appearance, lighting distribution, solar exposure, and structural loading.
Why I Never Rush the Foundation and Pole Stage
The foundation and pole installation stage is one of the easiest places for a project to save time in the short term and create problems later. I have found that many structural issues begin with rushed excavation, inaccurate anchor bolt positioning, insufficient concrete curing, or poor alignment during installation. These problems may not cause immediate failure, but they can lead to pole movement, loosening fasteners, foundation cracking, uneven loading, and difficult maintenance over time. That is why I prefer to invest more attention at this stage rather than trying to correct structural problems after the system is already operating. Once the foundation is stable and the pole is correctly installed, I can move forward with much greater confidence to the next step: installing the solar panel, battery system, controller, and electrical connections.
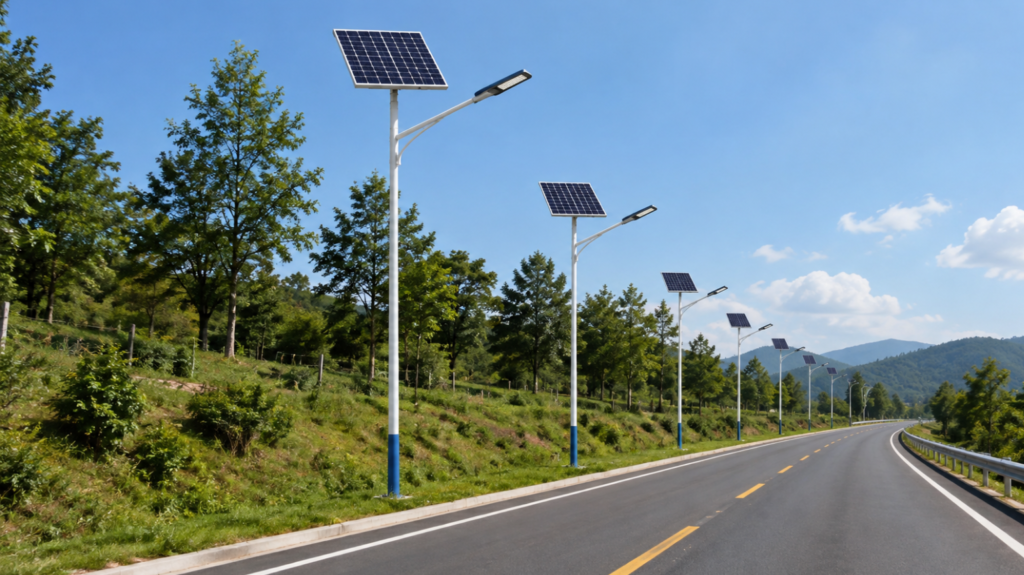
Step 4 Install Solar Panels Battery System and Electrical Connections
After the pole and foundation are secure, I move to the energy and electrical installation stage, where the solar panel, battery, controller, and LED lighting unit must be connected as one coordinated system. This is the point where mechanical installation becomes electrical integration, so I pay close attention to orientation, cable routing, polarity, protection, and accessibility rather than simply connecting components until the light turns on. A solar street light may look complete from the outside, but poor cable protection, loose connectors, incorrect polarity, or unsuitable battery placement can create failures long after commissioning. I therefore follow a deliberate installation sequence that protects both system performance and future maintenance, because the goal is not only to make the light operate on the first night, but to keep the charging, storage, and lighting functions stable under real outdoor conditions.
Solar Panel Installation
When I install the solar panel, I first confirm that its direction and tilt match the conditions identified during the site assessment. I want the panel to receive the longest practical period of unobstructed sunlight, so I verify orientation before fully tightening the mounting brackets and make sure nearby trees, buildings, poles, or other structures will not create avoidable shading. I also treat mounting strength as a structural issue rather than a simple fastening task, because the panel adds significant wind-exposed surface area above the pole. Brackets, bolts, and mounting points therefore need to remain secure under repeated wind and weather exposure. At the same time, I protect the panel cables from sharp edges, excessive bending, abrasion, water entry, and unnecessary movement. I route them through protected paths wherever possible and leave enough allowance for installation without creating loose loops that can rub against the structure. From my perspective, correct panel installation means achieving both reliable energy collection and reliable mechanical protection, because one without the other does not produce a durable system.
Battery Installation
The way I install the battery depends on whether the project uses an integrated or split solar street light design, but the priorities remain similar: protection, temperature management, electrical safety, and service access. I do not treat the battery as something that should simply be hidden wherever space is available, because its operating environment has a direct influence on performance and service life. I check that the battery location is protected from water entry, excessive heat, physical impact, and unauthorized access, while still allowing technicians to inspect or replace it when necessary. I also make sure the battery is mechanically secured so vibration, pole movement, or maintenance activity cannot loosen its connections. In hot or humid locations, I pay even more attention to enclosure conditions because temperature and moisture can accelerate aging or create connection problems over time.
Integrated Solar Street Light Battery Configuration
In an integrated solar street light, the battery is normally incorporated into the lamp or main housing, which makes the overall system compact and can simplify field installation. I like the reduced amount of external wiring and the cleaner appearance, but I still evaluate the internal environment carefully because the battery may be exposed to elevated daytime temperatures when the housing is heated by direct sunlight. I therefore consider enclosure design, heat dissipation, sealing quality, and the battery management system rather than assuming that an integrated structure automatically solves all environmental issues. Maintenance access is another factor I consider from the beginning. If a technician eventually needs to replace the battery, controller, or lighting module, the housing should be accessible without turning routine service into a major dismantling job. For me, a good integrated design balances compact installation with long-term maintainability.
Split Solar Street Light Battery Configuration
In a split solar street light system, the solar panel, lighting fixture, battery, and controller may be installed in separate locations, which gives me greater flexibility in positioning but also introduces more external connections that must be protected carefully. Depending on the project design, the battery may be mounted on or near the pole, housed inside a protected enclosure, or installed in another secure location. I pay particular attention to waterproofing, drainage, cable entry points, enclosure sealing, and the possibility of water collecting around the battery area. I also consider direct sunlight and temperature exposure because installing a battery inside a poorly ventilated metal box can create unnecessary thermal stress. At the same time, I avoid placing the battery in a location that is so difficult to access that routine inspection becomes impractical. In my experience, split systems can be very effective when they are designed around the actual site, but their reliability depends heavily on good enclosure design and disciplined cable management.
Electrical Wiring Connection
When I move to the electrical wiring stage, I think of the system in terms of the energy and control path between the solar panel, controller, battery, and LED light. In a typical solar street lighting system, the panel generates energy, the controller manages the charging of the battery, and the battery supplies the LED lighting load under the controller’s operating logic. I follow the manufacturer’s specified wiring sequence rather than assuming that every controller should be connected in exactly the same order, because some controllers require the battery to be connected before the solar input so that the system voltage can be recognized correctly. This is an important detail that I never generalize across all equipment. My objective is to ensure that each connection is made according to the actual controller, battery chemistry, and system voltage being used, while maintaining clear identification of positive and negative conductors throughout the installation.
Cable Selection and Waterproof Connections
I select cables according to system voltage, expected current, cable length, environmental exposure, and acceptable voltage drop rather than choosing whatever conductor is most convenient on site. Undersized cable can create unnecessary losses and heating, while poor-quality insulation can deteriorate quickly under UV exposure, high temperature, moisture, or repeated movement. I also pay close attention to connectors because external connection points are common places for water ingress and corrosion. Where connectors are exposed to the environment, I use suitable weather-resistant connections and make sure they are fully seated, mechanically supported, and protected from direct water flow. I avoid leaving electrical joints exposed or relying on temporary sealing methods that may fail after months outdoors. In my view, cable and connector quality rarely attracts attention during project handover, but it has a major influence on long-term maintenance and reliability.
Polarity Checking and Electrical Safety Protection
Before I energize the system, I verify polarity rather than relying on cable color alone. A reversed connection can damage a controller, battery interface, or lighting unit depending on the equipment design, so I confirm positive and negative conductors with appropriate test equipment and compare the results with the wiring documentation. I also check terminal tightness, insulation condition, cable routing, and protective devices before commissioning. Where the system design requires fuses, breakers, surge protection, grounding, or other electrical safeguards, I make sure they are installed according to the project specification and relevant local requirements. I never see these protections as optional details because solar street lights operate outdoors where lightning, moisture, temperature changes, and electrical faults are real operating risks. A professional installation should therefore protect not only the equipment but also the technicians and maintenance personnel who may work on the system later.
Why I Complete Electrical Installation With Verification Rather Than Assumption
At the end of this stage, I do not assume that correct-looking wiring means the system is ready for service. I verify that the panel connection is secure, the battery voltage is within the expected range, the controller recognizes the correct system conditions, and the LED load responds according to the intended control logic. I also inspect the complete cable route again because many small installation problems, such as loose connectors, exposed cable sections, sharp bends, or poorly sealed entry points, are much easier to correct before final commissioning than after the pole has been operating for several months. For me, the quality of this stage is defined by how well the solar panel, battery, controller, and lighting unit operate together as one protected electrical system. Once these connections have been installed and verified properly, I can move to the next critical step: testing and commissioning the solar street lighting system under actual operating conditions.
Step 5 Test and Commission the Solar Street Lighting System
After the pole, solar panel, battery, controller, and LED fixture have been installed, I do not consider the project complete until the entire system has been tested under operating conditions. Mechanical assembly only confirms that the equipment is physically in place; commissioning confirms that the system can actually generate, store, control, and deliver energy as intended. This distinction is important because many installation faults do not become visible until the system is energized. A loose terminal, incorrect controller setting, weak battery connection, or charging problem may not be obvious during assembly but can quickly affect nighttime operation. For me, commissioning is therefore the stage where I verify that the design assumptions, equipment configuration, and installation work are functioning together as one complete solar street lighting system.
Electrical Testing
I begin commissioning by checking the electrical side of the system because reliable lighting depends on reliable charging and energy storage. I verify that the solar panel is producing the expected input under the available sunlight conditions and that the controller is recognizing the charging source correctly. I then check battery voltage and confirm that it is within the expected operating range for the specific battery chemistry and system configuration. I also observe the controller status to make sure charging, battery protection, and load control functions are responding normally. If the battery voltage is unusually low, the controller shows a fault, or the charging current does not match the available solar conditions, I investigate the wiring, connectors, polarity, panel input, and controller settings before moving forward. I prefer to identify these issues during commissioning rather than wait for the customer to discover that the light only works for a few hours after several nights of operation.
Lighting Performance Testing
Once I am satisfied with the charging and battery conditions, I test the lighting functions to confirm that the system responds correctly to day and night conditions. I check whether the controller can automatically switch the LED fixture on when the solar input drops below the programmed threshold and turn it off again when daylight returns. I also verify that any programmed dimming schedule, time control, or motion-sensing function operates according to the project requirements. Beyond simply confirming that the lamp turns on, I look at the actual lighting coverage on the road or project area. I want to see whether the illumination reaches the expected distance, whether there are obvious dark zones between poles, and whether the light distribution suits the application. A lamp can technically operate while still failing to meet the project objective, so I consider nighttime performance, coverage uniformity, and actual operating duration just as important as the electrical test results.
Verify Nighttime Operation Under Real Conditions
Whenever possible, I prefer to evaluate the system during actual nighttime operation rather than relying only on daytime simulation. Real operation gives me a clearer view of brightness, beam distribution, pole spacing, automatic switching, and controller behavior. It also allows me to compare the finished installation with what the project owner expected during the design stage. For road projects, I pay attention to whether the illuminated sections overlap sufficiently to avoid uncomfortable dark gaps. For factory entrances, industrial parks, or community streets, I look at whether key access points, pedestrian areas, intersections, and security-sensitive zones receive adequate coverage. If the project uses staged dimming during the night, I also confirm that the reduced-power mode still provides acceptable visibility. This practical verification is important because a technically correct system should also deliver the lighting experience the customer originally purchased.
Final Installation Inspection
Before I move to project acceptance, I complete a final inspection of the entire installation rather than focusing only on electrical performance. I check pole alignment, foundation condition, anchor fasteners, solar panel mounting, cable routing, connector sealing, battery enclosure, controller installation, and the accessibility of components that may require future maintenance. I also look for small issues that may not affect operation immediately but can become maintenance problems later, such as exposed cable sections, loose protective covers, poorly sealed cable entries, or components installed where water can accumulate. I find this final inspection especially valuable because the project team is still on site and corrections are relatively simple. Once the equipment has been handed over and the installation crew leaves, even a minor repair can involve additional travel, labor, and coordination.
Final Project Acceptance
I treat project acceptance as more than asking the customer whether the lights are working. I prefer to confirm that the installation has been completed against the project requirements and that both sides understand what has been delivered. I review the installed quantity, system configuration, operating mode, key test results, and any project-specific settings before the final handover. I also confirm that the system performance observed during commissioning matches the agreed lighting schedule and application requirements. For larger EPC or infrastructure projects, this acceptance process becomes particularly important because it creates a clear record between the equipment supplier, installer, contractor, and project owner. In my experience, a structured acceptance process reduces later disputes because everyone has the same understanding of the final installed system at the point of handover.
Documentation and Customer Handover
I consider technical documentation part of the finished installation because the people maintaining the system months or years later may not be the same people who installed it. At handover, I want the customer or local EPC team to have access to the relevant system configuration, wiring information, controller settings, equipment specifications, operating instructions, and maintenance guidance. Where applicable, I also record serial numbers, installation locations, test results, warranty information, and any project-specific settings that may be needed for troubleshooting. Good documentation makes future maintenance much faster because a technician does not have to reconstruct the system from the beginning every time a problem appears. Mars Solar’s own project process similarly separates testing and delivery, installation guidance, and project acceptance into distinct stages, which reflects why I see commissioning and handover as formal parts of project delivery rather than optional work after installation.
Why I Never Skip the Commissioning Stage
The reason I place so much importance on commissioning is simple: a solar street lighting project should not be judged by whether the lamp turns on once, but by whether the entire system can operate predictably after the installation team leaves. I want to confirm that the solar panel is charging correctly, the battery is healthy, the controller is following the intended logic, the LED fixture provides the required coverage, and the mechanical installation remains safe and secure. When these checks are completed carefully, the customer receives more than installed equipment; they receive a verified operating system with a clear handover record. For me, that is the real point where solar street light installation is complete.
Common Solar Street Lighting Installation Mistakes That Affect Project Performance
When I review solar street lighting projects that underperform after installation, I often find that the failure is not caused by one obviously defective product. More commonly, several small decisions made during design or installation combine to reduce system reliability. The light may work normally on the first day, yet problems appear later when cloudy weather arrives, the foundation begins to move, shading reduces charging, or mismatched components operate outside their intended conditions. This is why I pay close attention to the mistakes that happen before and during installation. In my experience, preventing these problems is usually much easier and less expensive than correcting them after dozens or hundreds of lights have already been installed.
Mistake 1 Choosing System Capacity Without Considering Local Conditions
One of the most common mistakes I see is using the same solar street light configuration for projects in different countries or regions without adjusting the design for local conditions. I never assume that a panel and battery combination that performs well in one market will automatically deliver the same result somewhere else, because solar radiation, seasonal weather, nighttime operating hours, and required backup days can vary significantly. A system designed for strong year-round sunshine may struggle in a location with a long rainy season or frequent cloudy periods, even if the lamp wattage is identical. When I size a system, I look at the actual daily lighting load, available solar resource, expected operating schedule, and required autonomy together. If the project needs reliable operation through several low-sunlight days, I need to account for that before the equipment is selected rather than hoping the battery will compensate later. For me, system capacity should always be matched to the project environment, not copied from a previous quotation.
Mistake 2 Ignoring Foundation Requirements
I also see projects where the electrical system receives most of the attention while the foundation is treated as a routine construction detail. This can become a serious mistake because the pole, solar panel, lighting arm, and mounting structure are all exposed to continuous wind and weather loading. If the foundation depth, reinforcement, or anchor arrangement does not match the soil condition, wind load, and pole height, the installation may gradually become unstable. I do not use the same foundation assumption for compact soil, loose sand, soft clay, filled ground, or locations exposed to strong coastal winds. A taller pole and a larger solar panel can create much greater structural demand than a smaller system, so I consider these factors together before construction starts. From my perspective, a solar street light that produces perfect electrical performance but stands on an unstable foundation is still a failed installation.
Mistake 3 Installing Solar Panels Where Shadows Reduce Charging
Another mistake I regularly watch for is placing the solar panel in a location that looks clear during installation but experiences repeated shading during important charging hours. Trees, buildings, utility structures, signs, and even future vegetation growth can reduce the energy available to the battery. I never evaluate shading only at one time of day, because a panel that receives full sunlight at noon may still lose several hours of morning or afternoon generation. When charging is reduced day after day, the battery may never fully recover from nighttime use, which can eventually lead to shorter lighting hours or repeated low-state-of-charge operation. This is why I prefer to identify shading risks during the site assessment and select the pole and panel position before installation begins. In my experience, preventing a shading problem is far easier than increasing panel or battery capacity later to compensate for a poor location.
Mistake 4 Mixing Incompatible Components
I also consider component compatibility one of the most important areas of risk, especially when the solar panel, battery, controller, and LED fixture are sourced separately. Individual products can all appear technically acceptable while still performing poorly when combined in one system. I check whether the system voltage is consistent, whether the controller supports the selected battery chemistry, whether charging parameters match the battery requirements, whether the LED load is within the controller’s capacity, and whether the panel input stays inside the controller’s allowable range. If these relationships are ignored, the system may experience unstable charging, premature battery aging, controller faults, or inconsistent lighting performance. For this reason, I prefer matched system solutions where the major components are selected and tested as a complete configuration rather than assembled only because their individual specifications seem attractive.
Why These Mistakes Usually Appear After the Project Is Finished
What makes these installation mistakes especially difficult is that many of them do not create an immediate failure. A light may switch on during commissioning even when the battery is undersized, the panel is partially shaded, or the foundation is poorly designed. The real problems often appear weeks or months later when the system encounters several cloudy days, stronger seasonal winds, higher temperatures, or normal equipment aging. By that stage, the installer may need to return to site, replace equipment, strengthen foundations, or explain performance problems to the project owner. I have learned that this is why professional solar street lighting work requires more than passing a final switch-on test. I want the design and installation to remain reliable under the difficult conditions the project will eventually face, not only under the ideal conditions present on the handover day.
The Lesson I Apply to Every Solar Street Lighting Project
The lesson I take from these recurring problems is that reliable project performance depends on reducing uncertainty before installation begins. I want the system capacity to reflect local solar conditions and backup requirements, the foundation to reflect the actual structural environment, the panel location to provide dependable solar exposure, and the electrical components to operate as a coordinated system. When these four areas are handled correctly, many of the most common failures can be prevented before they reach the customer. In my view, this is also where an experienced system supplier adds value to an EPC contractor or electrical company: not by simply providing individual products, but by helping ensure that the equipment, site conditions, and installation requirements are technically compatible from the start.
Solar Street Lighting Installation Requirements for Different Applications
I do not use one installation standard for every solar street lighting project because the operating priorities can change significantly between a highway, factory, farm, industrial park, or community facility. The basic system still includes solar generation, battery storage, lighting, control, pole structure, and foundation, but the way I size and install those components depends on what failure would mean for that particular site. A road project may prioritize visibility and consistent overnight operation, while a factory may place more emphasis on perimeter security and access points. A remote agricultural site may value autonomy and minimal maintenance above everything else. This application-based thinking is important because Mars Solar already works across factories, farms, communities, industrial parks, schools, hospitals, and other off-grid or power-constrained environments, so I prefer to begin with the operating scenario and then adapt the installation requirements around it rather than forcing every project into the same configuration.
Road and Highway Lighting
For road and highway projects, I focus first on continuous nighttime performance, lighting consistency, structural reliability, and traffic safety because individual failures can affect much more than visual appearance. I need to understand the road width, pole spacing, mounting height, expected operating hours, vehicle speed, intersections, pedestrian activity, and areas where visibility is especially important before finalizing the installation arrangement. Long operating hours mean I pay particular attention to daily energy consumption and battery autonomy, because a system that performs well for only part of the night does not meet the practical purpose of road lighting. I also look carefully at panel exposure and seasonal solar conditions so that the battery can recover after nighttime discharge. On the structural side, open roads may expose poles and panels to considerable wind loading, which makes foundation design, anchor alignment, bracket strength, and pole stability essential. From my perspective, the goal is not simply to achieve high brightness directly beneath each lamp; I want predictable illumination along the route, dependable operation through changing weather conditions, and an installation that remains structurally safe throughout long-term outdoor use.
Factory and Industrial Area Lighting
When I evaluate solar street lighting for factories or industrial areas, I usually approach the project from an operational and security perspective rather than treating it like ordinary road lighting. Factory entrances, loading zones, internal roads, parking areas, warehouses, perimeter fences, and security checkpoints may all require different lighting coverage, and some locations are far more critical than others. I therefore look at where employees, vehicles, forklifts, delivery trucks, and security personnel actually move during the night and design the lighting layout around those activities. Continuous operation can be particularly important because a dark access road or security perimeter during a power interruption can create both operational and safety risks. I also pay attention to large-area coverage and pole spacing, because increasing lamp wattage alone does not automatically improve usable illumination if the beam distribution and mounting height are unsuitable. In industrial environments, I additionally consider dust, vibration, vehicle movement, accidental impact, and maintenance access. Mars Solar already positions solar and storage solutions around factories and industrial applications, so I see solar street lighting as part of the wider site-energy and reliability strategy rather than an isolated lighting product.
Agricultural and Remote Area Lighting
For agricultural and remote locations, I normally place more emphasis on energy independence, simple operation, and low maintenance because these sites may have little or no reliable grid access and can be far from professional service teams. I often need to think about farm roads, irrigation areas, equipment yards, livestock zones, storage areas, worker access routes, or remote compounds where conventional cabling would be expensive or difficult to install. In these projects, the advantage of solar street lighting is that each unit can operate independently, but that independence also means each light must be capable of generating and storing enough energy on its own. I therefore pay close attention to local solar conditions, nighttime operating hours, required backup during cloudy weather, battery temperature exposure, waterproofing, and the ease of accessing components for future maintenance. I also avoid unnecessarily complicated control strategies when a simpler configuration can deliver the required reliability, because every additional maintenance difficulty becomes more significant when the project is several hours away from the nearest technical team. This approach fits Mars Solar’s broader farm and remote-power application focus, where dependable off-grid operation is often more valuable than adding complexity to the system.
Community and Public Infrastructure Projects
For community streets, schools, clinics, public spaces, and similar infrastructure projects, I focus strongly on long-term reliability and straightforward maintenance because the system may need to serve a large number of people while operating with limited local technical resources. I want to understand which areas are most important to illuminate, such as entrances, pedestrian routes, intersections, gathering spaces, medical access points, or school boundaries, and then make sure the lighting design supports those real community needs. I also consider how easily local maintenance teams can inspect the battery, controller, lamp, and electrical connections because a system that requires highly specialized intervention for every small fault can become difficult to sustain over time. Durable pole structures, protected wiring, accessible components, suitable battery autonomy, and clear handover documentation become particularly important in these projects. Mars Solar’s existing application framework includes cities, villages, communities, schools, clinics, and other public facilities, which is why I view installation simplicity and maintainability as part of project quality rather than something to think about only after the equipment has been delivered.
Why I Adapt the Installation Strategy to the Application
The main lesson I apply across these different applications is that a reliable solar street lighting system should be designed around the consequences of failure at that particular site. On a highway, failure may affect road safety; in a factory, it may affect security and nighttime operations; on a remote farm, it may leave an area without any practical alternative lighting source; and in a community project, it may affect public access and essential services. I therefore do not start by asking which solar street light model should be installed. I start by asking what the site needs the lighting system to accomplish, how many hours it must operate, what environmental conditions it will face, and how the system will be maintained after handover. Once those questions are clear, I can make much better decisions about lighting output, battery capacity, solar generation, pole spacing, structural design, controller settings, and maintenance access, which is ultimately what separates a product installation from a professionally delivered solar street lighting project.
What EPC Contractors Should Prepare Before Starting a Solar Street Lighting Project
Before I prepare a solar street lighting proposal for an EPC contractor, I need more than a request such as “100 solar street lights” or “we need a quotation for a road project.” A useful technical proposal depends on how clearly the project requirements are defined before equipment selection begins. When the project location, lighting target, pole height, operating schedule, site conditions, quantity, and delivery expectations are available from the beginning, I can evaluate the system much more accurately and reduce unnecessary revisions later. In my experience, well-prepared project information does not only help the supplier quote faster; it also reduces the risk of selecting the wrong battery capacity, solar panel size, lighting distribution, pole specification, or foundation requirement. For EPC contractors, this preparation is especially important because the supplier’s configuration eventually becomes part of the contractor’s own commitment to the end customer.
Prepare the Core Technical Information First
The first information I want to understand is the basic technical scope of the project, including the project location, number of lights, required brightness or lighting performance, intended pole height, and expected operating hours each night. These parameters are closely connected, so I do not evaluate them separately. A taller pole changes the lighting coverage and may require a different fixture distribution, while longer operating hours increase daily energy consumption and therefore affect both solar panel and battery sizing. The project location is equally important because the same lighting requirement may need a different energy configuration under different solar conditions. If the EPC contractor already has a road drawing, lighting layout, tender specification, pole spacing requirement, or existing lamp specification, I prefer to review that information as early as possible. Even when the final design is not complete, these details give me a much stronger basis for building a system around the real project rather than producing a generic quotation that will need to be redesigned later.
Define the Lighting Requirement Instead of Only Giving Lamp Wattage
I often find that early project inquiries focus on lamp wattage, but I prefer to understand what the project actually needs to achieve on the ground. A request for a 60 W or 100 W solar street light does not tell me enough about the required road coverage, brightness, pole spacing, or nighttime visibility. I want to know whether the project is for a rural road, community street, factory access road, industrial park, parking area, or another application, because each environment has different priorities. I also want to understand whether the light must operate at full output throughout the night or whether dimming is acceptable during low-traffic periods. These operating decisions have a direct effect on energy consumption and system cost. From my perspective, the EPC contractor gets a more reliable proposal when the conversation starts with lighting performance and operating requirements rather than with a preselected product wattage.
Provide Site and Environmental Information
I also ask EPC contractors to provide as much site information as possible because environmental conditions influence both the electrical and structural design. I want to understand the available solar exposure, whether trees or buildings may create shading, the general installation environment, and the soil conditions where the poles will be installed. Photos, videos, road drawings, satellite images, or basic site notes can be extremely useful when an overseas supplier cannot immediately visit the project. Soil condition matters because the foundation requirement for compact ground may be different from loose sand, soft soil, filled land, or areas with poor drainage. I also pay attention to wind exposure, rainfall, humidity, temperature, and whether the project is in an open coastal or high-wind area. These details may affect the pole structure, mounting brackets, corrosion protection, waterproofing, battery environment, and foundation design. The more accurately I understand the actual site, the less likely the project team is to discover a structural or environmental problem only after the equipment has arrived.
Clarify Project Quantity and Commercial Scope
Once the technical requirements are reasonably clear, I need to understand the commercial scope because quantity affects much more than unit price. I want to know whether the contractor is requesting a preliminary budget for a tender, a confirmed project quotation, a pilot installation, or equipment for an already awarded project. A requirement for ten sample units and a confirmed order for several hundred street lights should not be handled in exactly the same way. Quantity can influence production planning, packaging, spare parts, container utilization, pole transportation, and the level of technical documentation needed for the project. I also want to understand whether the EPC contractor needs only the solar lighting units or expects a more complete package including poles, batteries, panels, controllers, mounting hardware, foundation accessories, or other project components. Clarifying this early helps me prepare a quotation that reflects the actual procurement responsibility instead of comparing prices for packages that contain different scopes.
Confirm the Project Timeline Before Finalizing the Solution
The project schedule is another piece of information I consider essential because a technically correct system can still fail commercially if it cannot arrive when the contractor needs it. I therefore ask when the project is expected to start, when the equipment needs to arrive on site, whether there is a tender submission deadline, and whether installation will be completed in one phase or several stages. If the EPC contractor is still bidding, I may focus first on providing a technically reasonable configuration and commercial budget that can support the tender. If the project has already been awarded, I need a much more detailed timeline for design confirmation, production, inspection, shipping, customs clearance, and site installation. In international projects, I always leave room for logistics and approval time rather than treating the factory production date as the final delivery date. This gives both the supplier and the EPC team a more realistic project schedule and reduces last-minute changes that can affect quality.
Define Delivery and Documentation Expectations Clearly
I also ask about delivery expectations because EPC contractors may have very different requirements depending on the project. Some need equipment delivered to a Chinese loading port, while others expect support with international shipping, export documentation, packaging plans, or phased deliveries. I want to understand the destination country, preferred shipping method, installation schedule, and whether the project has specific packing, labeling, inspection, or tender documentation requirements. For larger projects, I also consider whether spare components should be supplied with the main shipment and whether technical documents need to be prepared before equipment reaches the site. When these expectations are discussed early, I can coordinate the technical and logistics sides of the project rather than treating delivery as something that begins only after production is finished.
Why I Prefer Complete Project Information Before Quoting
I understand why EPC contractors often want a fast price, especially when a customer or tender deadline is approaching, but I have learned that the fastest quotation is not always the most useful quotation. If I receive only quantity and lamp wattage, I can provide a rough commercial reference, but I cannot confidently determine whether the proposed system will perform under the actual project conditions. When I receive the project location, lighting requirement, pole height, operating hours, solar and site conditions, quantity, timeline, and delivery expectations, I can evaluate the project as a complete system and give the contractor a much stronger basis for decision-making. For me, good project preparation is not paperwork added before the sale; it is one of the most effective ways to reduce technical risk, shorten later communication, and help an EPC contractor move from quotation to installation with fewer surprises.
How to Choose a Reliable Solar Street Lighting System Supplier
When I evaluate a solar street lighting supplier, I do not start with the lowest unit price or the largest product catalog. I first ask whether the supplier can help reduce the technical and delivery risks that usually appear between project design, equipment procurement, installation, and final handover. For an EPC contractor, a supplier becomes valuable when it can understand the project location, lighting requirement, operating hours, environmental conditions, and installation schedule, then translate that information into a workable system rather than simply quoting a standard lamp model. I therefore look at technical support, complete supply capability, project experience, quality control, and installation support together. A reliable supplier should make the EPC contractor’s work easier before the order is placed, during production, and after the equipment reaches the project site.
Technical Support Capability
The first thing I evaluate is whether the supplier can provide real technical support before equipment selection begins. I want to see whether the team can review the project location, pole height, lighting requirement, operating hours, solar conditions, and environmental information and then recommend a suitable system configuration. For me, system design support is more valuable than simply receiving a quotation because it helps verify whether the solar panel, battery, controller, LED fixture, and pole specification are actually suitable for the application. I also look for BOM assistance because EPC contractors often need a clear breakdown of the complete equipment package for budgeting, tender preparation, procurement, and installation planning. Engineering guidance becomes especially important when questions appear about battery autonomy, panel sizing, controller settings, wiring, foundation considerations, or installation sequence. A supplier that can only provide product specifications may still sell acceptable equipment, but I would not consider that enough for a project where the EPC contractor is responsible for delivering the final system to an end customer.
Complete Supply Capability
I also prefer suppliers that can coordinate the main solar street lighting components as one system rather than forcing the contractor to source solar panels, batteries, controllers, lighting fixtures, and related components from several unrelated factories. The reason is not simply convenience. When the major components come from different suppliers, the EPC contractor takes on more responsibility for checking voltage compatibility, charging parameters, battery chemistry, controller limits, lighting load, communication, warranties, and delivery schedules. I therefore look for a supplier that can provide or integrate the solar panel, battery storage, controller, LED lighting system, and other required equipment under one technical configuration. Mars Solar’s broader product structure already covers solar generation, lithium battery storage, power conversion, system design, production, installation guidance, and project acceptance, which reflects the type of integrated supply approach I consider valuable for project-based buyers.
Project Experience
Project experience matters to me because international solar projects rarely follow exactly the same conditions as factory testing. A supplier that has already worked with overseas customers is more likely to understand the practical issues around different climates, shipping requirements, site conditions, installation capabilities, technical communication, and after-sales coordination. I do not only ask how many countries a supplier has sold to; I want to understand what types of projects it has supported and whether its experience is relevant to the application I am planning. Road lighting, rural infrastructure, factory sites, community projects, and remote installations can create very different requirements. Mars Solar states that it has operated in more than 130 countries over 17 years and supports applications ranging from factories and farms to communities, schools, hospitals, and other power projects, so this type of project diversity is the kind of background I would examine when judging whether a supplier can support different installation environments.
Installation and Engineering Support
I also evaluate what happens after the equipment leaves the factory because this is where many supplier relationships become weak. An EPC contractor may have its own installation team, but technical questions can still appear during assembly, wiring, controller setup, commissioning, or troubleshooting. I therefore want a supplier that can provide installation guidance, drawings, wiring information, configuration support, and remote technical assistance when needed. This does not mean I expect the overseas supplier to replace the local EPC contractor or take responsibility for local civil works, permits, grid requirements, or long-term site maintenance. I see the relationship differently: the local EPC team should remain responsible for local execution, while the supplier should provide reliable equipment and technical backup for the system it designed and supplied. Mars Solar’s stated project process includes demand analysis, design and production, testing and delivery, installation guidance, and project acceptance, which is much closer to the support structure I would expect from a project supplier than a simple product shipment.
Quality Control Before Delivery
Quality control is another area I examine carefully because solar street lighting equipment may operate for years in heat, rain, humidity, dust, and changing weather conditions, often in locations where maintenance is expensive. I therefore want to know how the supplier verifies equipment before shipment rather than relying only on certification logos or datasheets. I look for documented inspection procedures, functional testing, battery and controller checks, and consistency between the approved configuration and the equipment that is actually produced. Mars Solar states that its equipment undergoes a 72-hour full-load test before dispatch, and its technical materials also describe standardized electronic design and system monitoring functions. For me, this type of pre-delivery testing is useful because the objective is to identify potential problems before equipment is shipped thousands of kilometers to a project site where correction becomes much more costly.
Do Not Evaluate a Supplier by Price Alone
I understand why price is important, especially when an EPC contractor is competing for a tender or working within a strict project budget, but I do not believe the cheapest quotation automatically creates the lowest project cost. A small saving on equipment can disappear quickly if the battery capacity is wrong, components are incompatible, the supplier cannot provide technical answers, replacement parts are unavailable, or delivery problems delay installation. I therefore compare quotations based on the complete scope of supply, technical configuration, warranty responsibilities, engineering support, quality control, documentation, and delivery capability rather than comparing only the final unit price. In my experience, a slightly higher equipment cost can be commercially safer if it reduces redesign, rework, site delays, customer complaints, and unexpected replacement costs after installation.
The Supplier I Would Choose for an EPC Project
If I were selecting a solar street lighting system supplier for an EPC project, I would ultimately choose the company that can understand the project before trying to sell me a product. I want a supplier that asks about the project location, operating hours, lighting requirement, pole height, solar conditions, installation environment, quantity, timeline, and delivery expectations before finalizing the system. I also want technical support, a coordinated BOM, compatible components, documented quality control, and practical support during installation and commissioning. That is why I believe the strongest supplier relationship is not built around a single purchase order. It is built around whether the supplier can help the EPC contractor reduce technical uncertainty and deliver a more reliable project to the end customer.